Mastering SSH Remote IoT on Raspberry Pi for Free: The Ultimate Guide
SSH remote IoT on Raspberry Pi free is an excellent way to control and manage devices remotely, opening up endless possibilities for automation and data collection. Imagine being able to access your Raspberry Pi from anywhere in the world without incurring additional costs. This is not just a dream but a reality with the right setup and tools. Whether you're a beginner or an experienced developer, this guide will walk you through the process of setting up a secure SSH connection for your IoT projects.
Remote IoT management using Raspberry Pi has become increasingly popular due to its versatility and affordability. By leveraging SSH (Secure Shell), users can execute commands, transfer files, and monitor their devices securely. This article will provide step-by-step instructions, tips, and tricks to ensure your setup is both efficient and cost-effective.
As you delve deeper into this guide, you'll discover how to configure your Raspberry Pi for remote access, set up firewalls, and troubleshoot common issues. By the end of this article, you'll have the knowledge and confidence to manage your IoT projects seamlessly, all while keeping costs to a minimum.
Introduction to SSH Remote IoT on Raspberry Pi
SSH remote IoT on Raspberry Pi free offers a powerful solution for managing devices remotely. Secure Shell (SSH) is a network protocol that allows users to access and control remote systems securely. With Raspberry Pi, you can set up a low-cost, energy-efficient platform for IoT projects. This section will cover the basics of SSH and how it applies to IoT applications.
SSH provides encryption for all data transmitted between your local machine and the Raspberry Pi, ensuring that sensitive information remains protected. By leveraging SSH, you can execute commands, manage files, and monitor system performance from anywhere in the world.
Whether you're working on home automation, environmental monitoring, or industrial IoT applications, SSH remote IoT on Raspberry Pi free is a versatile tool that can enhance your projects' functionality and accessibility.
Setting Up Your Raspberry Pi for SSH
Installing SSH on Raspberry Pi
Before you can start using SSH for remote IoT applications, you need to ensure that SSH is enabled on your Raspberry Pi. By default, SSH is disabled on newer versions of Raspberry Pi OS for security reasons. To enable SSH, follow these steps:
- Boot your Raspberry Pi and log in to the desktop environment.
- Open the terminal and type
sudo raspi-config. - Select "Interfacing Options" and navigate to "SSH".
- Choose "Enable" and reboot your Raspberry Pi.
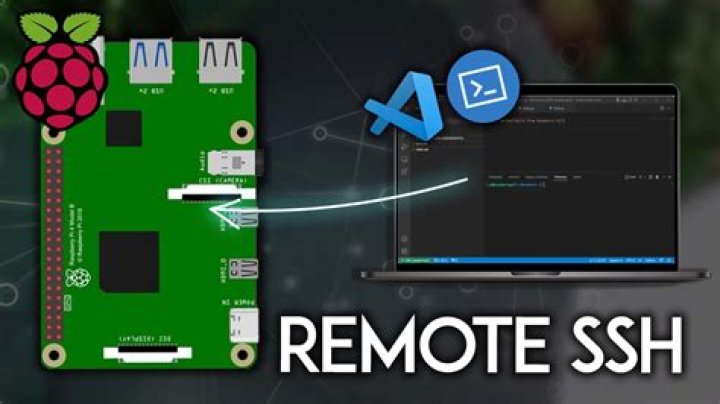
Connecting to Your Raspberry Pi via SSH
Once SSH is enabled, you can connect to your Raspberry Pi from another device using an SSH client. On Windows, you can use PuTTY, while macOS and Linux users can use the built-in terminal. To connect, you'll need the IP address of your Raspberry Pi. You can find this by typing hostname -I in the terminal.
Using an SSH client, enter the IP address, username (usually "pi"), and password to establish a secure connection. This will allow you to execute commands and manage your Raspberry Pi remotely.
Securing Your SSH Connection
Security is paramount when setting up SSH remote IoT on Raspberry Pi free. While SSH provides encryption for data transmission, additional measures can be taken to enhance security. Here are some best practices:
- Change the default password for the "pi" user to something more complex.
- Disable password authentication and use SSH keys for secure login.
- Change the default SSH port (22) to a non-standard port to reduce automated attacks.
- Install a firewall and configure it to allow only necessary traffic.
By implementing these security measures, you can protect your Raspberry Pi from unauthorized access and potential threats.
Understanding Port Forwarding
What is Port Forwarding?
Port forwarding is a technique used to allow external devices to access your Raspberry Pi through your router. This is essential for SSH remote IoT on Raspberry Pi free, as it enables you to connect to your device from outside your local network. To set up port forwarding, follow these steps:
- Log in to your router's admin interface.
- Locate the "Port Forwarding" or "NAT" settings.
- Add a new rule, specifying the external port, internal IP address of your Raspberry Pi, and internal port (usually 22).
- Save the settings and test the connection.
Best Practices for Port Forwarding
When configuring port forwarding, it's important to follow best practices to ensure security and reliability. Use non-standard ports for SSH, limit access to specific IP addresses if possible, and regularly monitor your network for suspicious activity.
Essential Tools for SSH Remote IoT
Several tools can enhance your experience with SSH remote IoT on Raspberry Pi free. Here are some recommendations:
- SSH Clients: PuTTY (Windows), Terminal (macOS/Linux).
- File Transfer: SCP (Secure Copy Protocol) or SFTP (SSH File Transfer Protocol).
- Monitoring Tools: htop, sysstat, and vnstat for system monitoring.
- Automation Tools: cron for scheduling tasks and Ansible for configuration management.
These tools can streamline your workflow and improve the efficiency of your IoT projects.
Automating Your IoT Projects
Using Cron for Task Scheduling
Cron is a time-based job scheduler in Unix-like operating systems, including Raspberry Pi OS. It allows you to automate tasks such as data collection, system updates, and backups. To create a cron job, use the crontab -e command and add your desired commands with the appropriate schedule.
Implementing Ansible for Configuration Management
Ansible is a powerful automation tool that simplifies the management of multiple devices. By creating playbooks, you can define configurations and deploy them across your IoT network. This ensures consistency and reduces the risk of errors.
Common Issues and Troubleshooting
Even with the best setup, issues can arise when working with SSH remote IoT on Raspberry Pi free. Here are some common problems and their solutions:
- Connection Refused: Ensure SSH is enabled and the correct IP address and port are used.
- Authentication Failed: Verify the username and password or check SSH key permissions.
- Network Issues: Restart your router or check your internet connection.
If you encounter persistent issues, consult the official Raspberry Pi documentation or seek help from online communities.
Benefits of Using SSH for IoT
SSH remote IoT on Raspberry Pi free offers numerous advantages for developers and hobbyists alike. Some key benefits include:
- Security: Encrypted data transmission protects sensitive information.
- Cost-Effectiveness: No additional hardware or software costs.
- Flexibility: Access your Raspberry Pi from anywhere in the world.
- Scalability: Easily manage multiple devices with automation tools.
These benefits make SSH an ideal choice for remote IoT applications.
Cost-Effective Solutions for Remote IoT
One of the primary advantages of SSH remote IoT on Raspberry Pi free is its cost-effectiveness. By leveraging open-source software and low-cost hardware, you can create powerful IoT solutions without breaking the bank. Consider the following tips to maximize your budget:
- Use Raspberry Pi as the central hub for your IoT network.
- Leverage free or open-source software for automation and monitoring.
- Minimize hardware requirements by optimizing your projects.
With careful planning and resource management, you can achieve professional-grade results without incurring significant expenses.
Conclusion and Next Steps
In conclusion, SSH remote IoT on Raspberry Pi free provides a powerful and cost-effective solution for managing devices remotely. By following the steps outlined in this guide, you can set up a secure and efficient SSH connection, automate your IoT projects, and troubleshoot common issues. Remember to prioritize security and explore the many tools available to enhance your experience.
We encourage you to share your thoughts and experiences in the comments section below. Have you tried SSH remote IoT on Raspberry Pi free? What challenges did you face, and how did you overcome them? Don't forget to explore other articles on our site for more tips and tutorials on IoT and Raspberry Pi projects.
